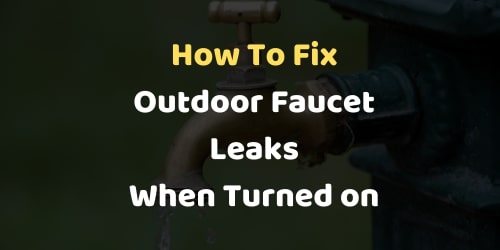
Outdoor Faucet Leaks When Turned on
Disclosure: Faucetshowerguide.com is reader-supported. We may receive commissions from purchases made via our links at no additional costs to you.
A leaky faucet is irritating and can be costly if you don’t repair it on the time. Sometimes people ignore the outside faucet leaking issue. People don’t bother about it same as the indoor faucet leaking issue. An outside leaky faucet can cause water damage to the wall or flooring.
If water continues leaking for a long time period, it damages the wall and foundation of the house. Outdoor faucet leaks when turned on can cause major damage to the house.
The outdoor faucet faces all types of weather. They leak over time due to lots of wear and tear. However, fixing a leaky outdoor faucet is easier than you might think. This guide shows you a DIY process to fix outdoor faucet leaks.

On Sale
Spot resist stainless finish, pulldown hose offers flexible water delivery, Power Clean spray technology, 22.5-inch tall neck spout
Why Does My Outdoor Faucet Leak When I Turn It On?
There are several reasons why outdoor faucet leaks when turned on. When you get the right reason for the leakage, you can quickly fix it and also save your precious time and money. A leaking faucet increases your water bill and also damages the outside property.
Clogged Pipes
The main reason for clogged pipes is mineral deposits. Water contains different minerals and when water flows through pipes sometimes minerals stick to the inlet body of the pipe.
With time the quantity of mineral build-up increases and causes improper water flow. So, when you turn on the outdoor faucet trapped water begins to leak.
Damaged Washer

The washer of the outdoor faucet is durable and stays long. But sometimes due to low-quality material, the washer becomes loose.
The washer creates a proper seal to stop the water. But when its seal’s fitting is not tight, water starts leaking when you turn on the handle. Wear out washer causes leakage but don’t worry its replacement is easy and cheap.
Frozen Pipes
Frozen pipes are not a common issue for outside faucet turn on itself. Frozen pipes issue occurs when the temperature is low. Temperature near zero or below is responsible for the frozen pipe.
Due to low-temperature water freezes into the pipe and frozen water needs more space for storage. But due to limited available space, it causes cracks in the pipe.
Can You Repair Outdoor Faucet Leaks When Turned On?

Repairing an outdoor faucet leak is possible if there is no crack on the faucet body. You can also repair cracks but its cost is almost similar to a new outdoor faucet.
Worn-out washers or mineral build-ups are easy to repair. These are minor repairs that need less time and budget. Change the washer or remove build-up to solve the leakage issue in the faucet. Check the outdoor faucet carefully and decide whether you should repair it or replace it.
How Do You Fix a Dripping Outside Faucet Handle When Water is Turned on?
Step 1 – Turn off Water Supply
Before starting the leaking outdoor faucet repair process, you should turn off the water supply to the faucet. Go to the main shut-off valve of the house and turn it off.
Step 2 – Drain Water
After turning off the valve. Now turn on the handle of the faucet, so the remaining water comes out and the pipe fully drains. If you don’t do this due to water, the wrench does not fit properly on the nut and slips when you put pressure.
Step 3 – Remove the Handle
To remove the handle, you need to remove the screw of it. Use a screwdriver to remove the screw of the handle.
After removing the handle, you will see a packing nut. Use a wrench to remove this packing nut. Turn the wrench counterclockwise to remove the nut. Now you can see the washer.
Step 4 – Replace the Washer
Use a nose-needle plier to remove the washer. With time washer is worn out and becomes useless. A worn-out washer is responsible for outdoor faucet leaks when its handle turns on.
You can place an order for a washer online if you know its size or take the washer to your nearest hardware shop and buy an exact match washer.
Insert the washer and put grease on it for a better life. Tighten it properly and then tighten the packing nut. Move the wrench clockwise to tighten it. Now tighten the handle and turn on the water supply. No water leakage issue will occur.
So, these all steps are necessary to follow to solve outdoor faucet leaks when the handle turns on.
What Is The Cap on Top of an Outdoor Faucet?

Many outdoor faucets come with a circular cap on top of them. This cap is known as a vacuum cap. This cap is screwed or slips on the faucet. Under this cap, there is an anti-siphon valve.
The water supply line of the outdoor faucet is also connected to other faucets in the house. Everyday water demand is different. On holidays, water demand increases in the house because all people are at the home the whole day and use more water.
Extra demand for the water increases the flow of the water in the supply lines. This water flow creates suction in those pipes that are not being used (Mostly outdoor faucets).
An anti-siphon valve prevents transferring of the vacuum to the nozzle. This vacuum can cause leakage in the outdoor faucet. So, this anti-siphon cap is needed to prevent leakage.
Check also – Can’t Remove Stem From Outdoor Faucet
How Do I Fix a Leaky Garden Hose Faucet?
If your garden hose faucet is leaking, follow the below steps to solve this issue.
- Turn off the main shut-off valve.
- Open the faucet to let the remaining water drain out. After turning the valve off, still, some water remains in the faucet pipes. Opening of faucet handle is essential to remove this remaining water.
- Now use a screwdriver and wrench to remove the nuts and screws of the faucet. Keep the process simple to avoid any damage to the supply lines. If faucet nuts don’t open then don’t force anything, it may damage the supply line. Spray some penetrating oil or lubricant on it so its nuts become loose.
- Now check if the faucet is in good condition and you just need to change its washer then change it or otherwise replace a faucet.
- To replace the faucet, use a brush to clean rust or build-up from the pipe threads. This cleaning will ensure a tight seal when you install a new faucet.
- Now wrap the Teflon tape on the threads. Wrap 3-4 rounds of the tape on threads. Teflon tape fills all gaps in threads so no chance of water leakage.
- Install a new outdoor faucet and tighten it properly.
Final Words
Don’t take it lightly if the outdoor faucet leaks when turned on, it can cause serious damage to the outdoor house property. After reading this guide, you would know that repairing outdoor faucet leaking is not tough. Whether leakage is huge or small, it is not good for you and the environment. So, repair it as quickly as possible.

Meet Ralph Matthews, father of 2 cute daughters and a skilled plumber with over 10 years of experience in the industry. Ralph has particular expertise in repairing any type of faucet and has helped countless homeowners and businesses solve their plumbing problems with his expert knowledge and attention to detail.


